
With the help of this guide, you can find the ideal audio interface for your specific music or content production requirements. My home recording career started 16 years ago when I picked up my first audio interface, an M-Audio M-Track 2, and a copy of Cakewalk to create demos for my band. In the last year alone, I’ve reviewed 15 audio interfaces for MusicRadar. It was a rudimentary setup by today’s standards, but it put me on a musical journey that still plays a significant role in my life today. I’ve worked with innumerable interfaces over the years, recording musicians and bands ranging from rock and metal to jazz and hip-hop.
In relation to hands, I’ve had mine on every single interface in this guide, and in my opinion, there isn’t that much difference between audio interfaces at this level. I’m recommending audio interfaces for home producers, not multi-thousand-dollar rack mount units for professionals in studios – the pros already know what they like. The interfaces I’ve picked are manufactured by major brands with a history in the professional recording space. This means all of them will do a brilliant job of their primary task – capturing audio. Where they differ is in their features, so while one interface could be perfect for podcasting, it might not excel for vocal recording.
1.Audient ID4 mkII
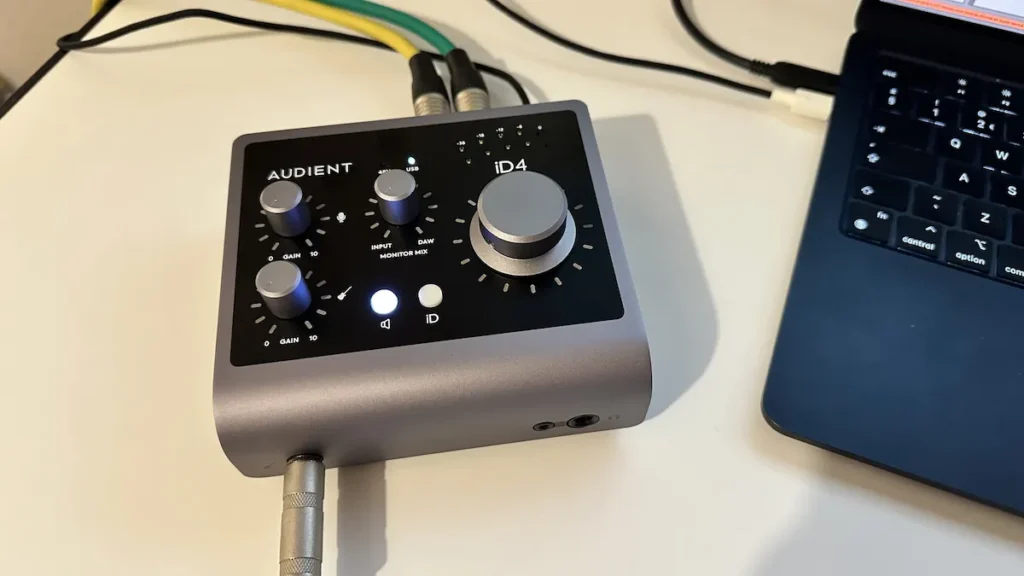
Audient’s iD line of low-cost interfaces has a lot of expectations for its second edition. The original iterations were well regarded since they stood out from the crowded entry-level interface bracket because to a combination of well-considered design and some pleasant quality-of-life features. Fortunately, the Audient iD4 MKII’s features are immediately noticeable.
With a single ¼” jack input on the front and an XLR/jack combi input on the back, we have a rather basic two-in/two-out USB audio interface. Furthermore, there is a stylish dual-output headphone area on the front with a 3.5mm and a ¼” output. You can use one of these as an auxiliary output or both at the same time.to send audio out to a guitar pedal. The back of the unit then houses the standard stereo jack outputs and connection for the interface’s USB-C cable. All of the main controls – gain for both channels, a monitor mix knob and a large, chunky volume encoder – sit atop the surface of the unit, keeping them within easy reach for those crucial tweaks.
Setting up the iD4 MkII is as easy as it gets, as you might think. I made sure the correct drivers were installed on my Windows test computer before just plugging it in. It was even easier because the MacOS computer handled all the background work on its own. Additionally, because the packaging states that it is compatible with iOS, I tested it with my iPhone as well, and I can say that this was likewise a painless process.
The all-metal build of the iD4 MkII makes it a highly solid device with a robust feel. The main volume encoder had a nice weight to it, and the three smaller encoders (two gain and one monitor mix) felt precise and smooth.I did find the gain level LEDS sometimes took a second to ‘catch up’ with the inputs I was making on the main encoder but this isn’t likely to make or break your recording session.
I used Ableton Live as my test DAW and discovered that the iD4 performed just as I had requested with no hassles. Simplicity is most likely the most important metric to consider when testing a low-cost audio interface. Making things as reliable as possible is a smart move at this price range because you’re probably targeting those who might not be very knowledgeable about music technology. This test is easily passed by the iD4.
I wanted to record my parlor acoustic guitar for the test setup, so I plugged a Neumann TLM102 condenser microphone into the back of the device and turned on the built-in phantom power to make sure we got a signal. I used the JFET input on the front to obtain a clear signal.
Pros
- Great for guitars
- Simple to use
Cons
- Not much to criticise at this price!
2.Audient EVO 4 USB
Audient gained notoriety for their large mixing desks, which were used in many high-end recording studios. More recently, they have been garnering recognition for their ID family of small-to-medium sized audio interfaces.
For their excellent sound, these make use of some of the technology found in those large desks, particularly the ASP8024 preamp. The EVO line of interfaces, which Audient unveiled at this year’s NAMM show, are intended to be a whole new and small interface solution rather than to replace the ID line.
Instead of asserting that this is “the world’s smartest audio interface,” the audience asks. Perhaps we could respond to it for them.
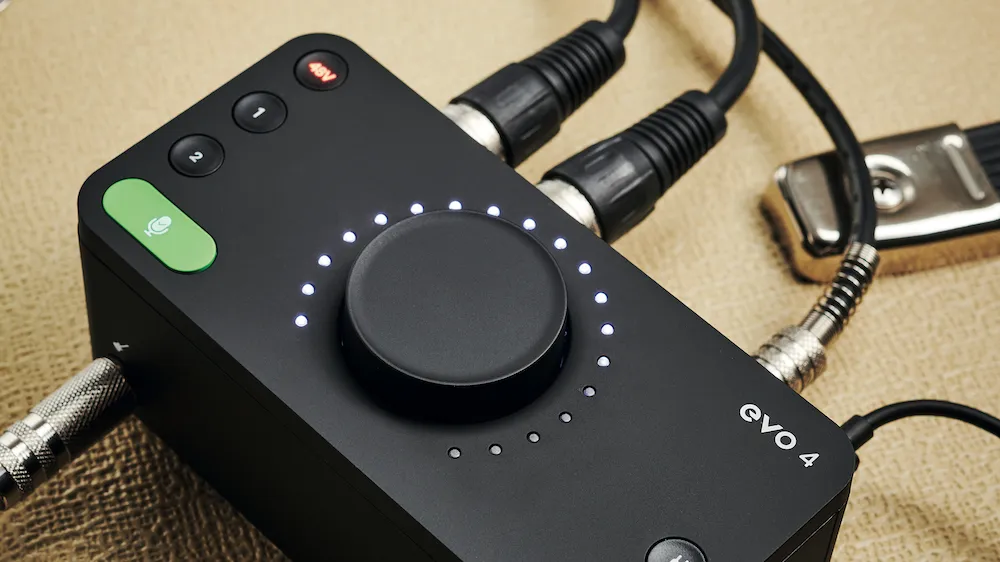
The larger 8 (which doubles the inputs and outputs to four each) is what we’re testing here.Since there is nothing here to make matters more complicated, the assertion appears to be accurate on the surface. The EVO 4 has a single instrument level input at the front for attaching a guitar or bass (which then overrides the first input around the back), and two combi mic/line inputs around the rear.
The connections are finished by two speaker outs around the back, and a central main dial regulates the output level as well as several other levels that are mostly controlled by the buttons you press on the top of the panel. These include output (bottom right), input levels 1 and 2, and a final button that indicates the dial changes the mix between the input and DAW. When you use the headphone socket, the main dial controls this level.
A little out of the ordinary in this plug-and-play world is the requirement to download the most recent software and driver in order to update the firmware (needed for the test), which took less than a minute after a few rounds of LED blinking.
The interface was then immediately picked up by Logic for some quite clear playback (in fact, it is comparable to the ID44 that we also have in the studio). We also used Cubasis on an iPad to test the device with an optional camera connection kit, and the findings were just as clear.
Pros
- The one-dial-fits-all fix works a treat.
- Great, clean sound.
Cons
- An angled front would have suited us better.
3.PreSonus Studio 24C
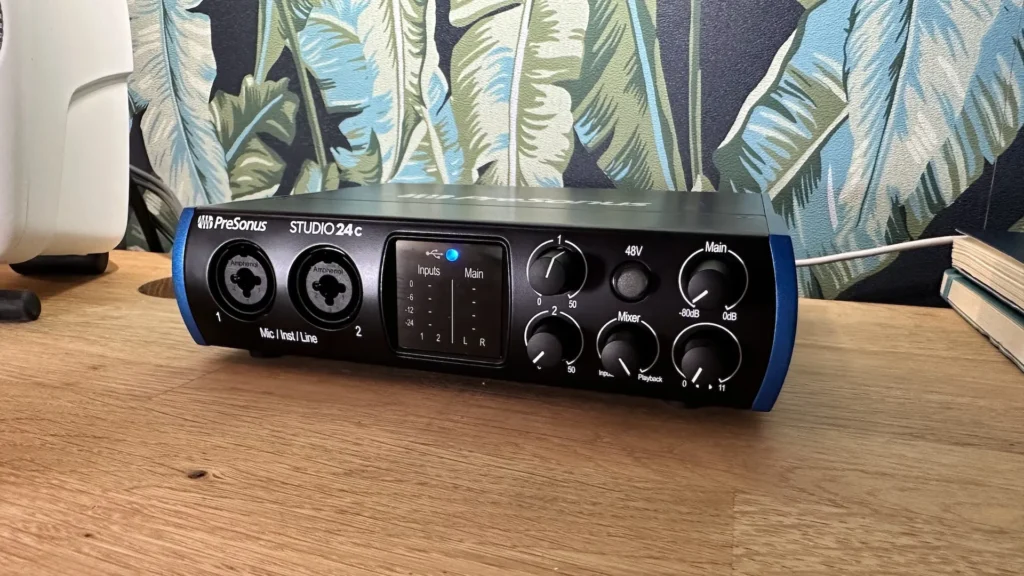
With an input/output combination to fit any user’s needs, the PreSonus Studio 24c is a member of a larger range of audio interfaces. Today’s 24c has become one of the most well-liked interfaces in its price range, and many users find it to be a good substitute for the more widely used Focusrite Scarlett line. Even when compared to the new Scarlett 2i2 4th-generation lineup, the PreSonus appears to have several advantages on paper.
To begin with, the Studio 24c features MIDI in/out connection points, which are a huge help to anyone who uses external keyboards, synths, samplers, or sequencers. This enables you to encode music into your preferred DAW and use it to control a variety of other devices.or vice versa. So, as the hub of a broader studio environment, where the laptop plays a role rather than being the be-all and end-all, the PreSonus is a wiser choice than the equivalent Focusrite.
The Studio 24c immediately demonstrates its strengths in terms of sound, both in terms of the sounds themselves and the possibilities they offer. Vocals and speech applications have plenty of clean headroom thanks to two excellent PreSonus mic preamps, making them ideal for editing within your software. Furthermore, you may play and record guitars, basses, synths, and more with the help of two high-headroom instrument preamps. Bright LEDs on the front of the device make input monitoring visible and easy to grasp, and direct monitoring allows you to record without delay or lag. The Loopback capability is available through the PreSonus software bundle in Universal Control. This implies that you can easily and swiftly transport audio from one app—for example, a game—to your favorite streaming service.
Other specifics are a little more arbitrary. For instance, the Studio 24c’s headphone connection is located at the back, which may work for you but not for me. Additionally, I found it a little difficult to use, especially with my sausage fingers, because of the five rotary knobs and the 48v phantom power button’s close proximity. However, these are minor details. Overall, there are many positive aspects of this robustly constructed, well-designed interface.
These days, it’s reasonable to assume that you can take an audio interface out of the box, put it into your laptop or other device, and start using it right away. However, going forward, we want more from our gadgets than that. Fortunately, with the inclusion of Loopback, MIDI connectivity and other small quality-of-life features, the PreSonus Studio 24c elevates itself above the competition and manages to do so at a very sensible price.
Pros
- Loopback adds genuine utility
- Superb, clean sound
Cons
- The controls are quite close together
4.Focusrite Scarlett 2i2
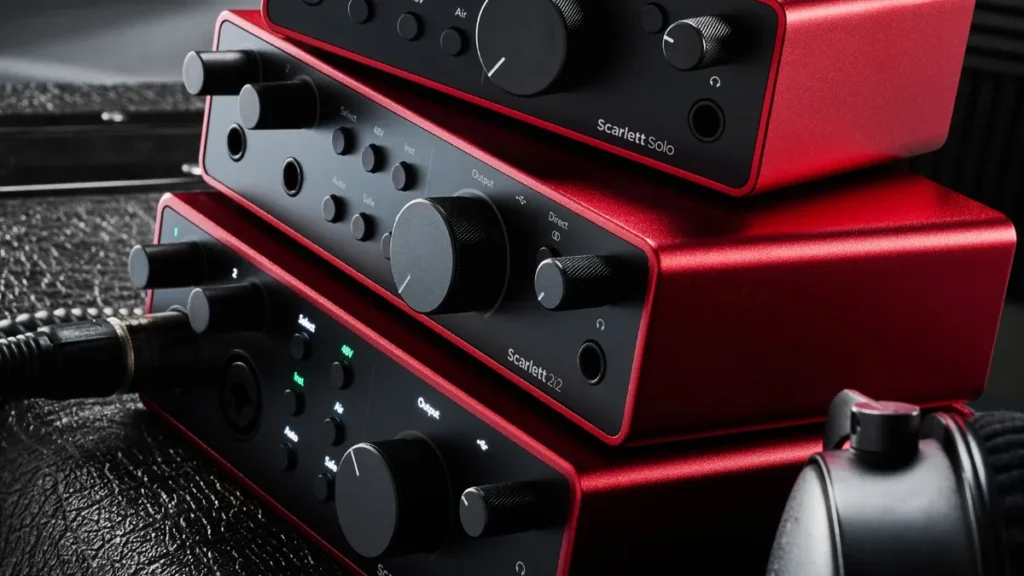
Probably the most well-known audio interface ever created is Focusrite’s omnipresent red box, which definitely caught my eye when the Gen 1 was released in 2011. It still functions now, which is evidence of its exceptional endurance. I used it to record a number of bands while I was in college. With better preamps, exceptional low latency performance, and an extremely low noise floor, the Scarlett 2i2 has advanced significantly from its initial generation, and we are currently on Gen 4.
When I tried the 2i2 4th Gen, its vast feature set was among the things that most impressed me. In addition to standard features like phantom power and a line-and-mic mix of inputs, it now comes with with three flavours of preamp mode. The first is a basic, super clean, and detailed sound from the preamps. With a push of the ‘Air’ button, you can add a presence boost to your signals, increasing the high end. A second press gives you a mid-range harmonic boost which is useful for adding a little more punch to things that need to stand out in the mix.
You can “train” your interface on your specific input by playing, singing, or drumming for a short while while it measures the signal strength in auto-gain mode. After that, the interface will automatically adjust your input gain to the ideal recording level, which is often around -6dBFS. Additionally, a clip-safe mode is included, which is helpful for sources with high volume, such as acoustic drums. It will be quite beneficial for novices who are less experienced in adjusting their input gain because it prevents your input levels from becoming overwhelmed, which could potentially damage a take.
The only actual restriction on the amazing low latency performance provided by Scarlett’s Windows drivers is the specifications of your laptop or PC. I discovered that by drastically reducing the buffer settings on my somewhat outdated Windows computer, I might rhythmic parts without having to account for any delay or edit takes in post. On Mac you can go a step further and utilise something called ‘codeless kernel extension’ This allows you to drop your latency to below the 5ms mark which is a frankly incredible number considering the cost.
I found the Scarlett 2i2’s unique “Focusrite Control” app to be quite helpful as it allows for completely hands-free use. With just a few mouse clicks, you may choose your channels and adjust the gain levels if your configuration is more permanent. It also installs firmware updates for your interface automatically.
One of the better software packages of the interfaces in this guide is included with the Scarlett 2i2 4th Gen. It includes Ableton Live Lite, a 3-month subscription to Pro Tools Artist, and a 6-month FL Studio Producer Edition, which should meet the bulk of DAW requirements. Additionally, it includes the Hitmaker Expansion, which includes a variety of EQs and compressors, synths, amp modellers, and VST drums.
Pros
- Excellent quality preamps
- Compact size, rugged build
Cons
- Certain functions rely on software
5.EVO Audient 8 USB
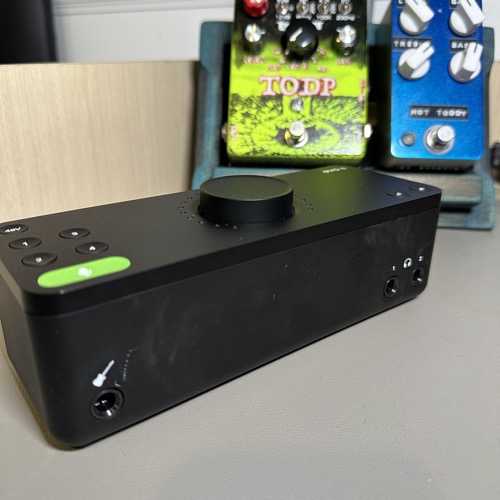
With its straightforward, easy-to-use, and functional design, the EVO 8 is a 4-in and 4-out studio interface that makes recording of any kind effortless and effortless.
Let’s begin by going over the top panel of the controls. The Phantom Power button and the four input choices are located on the far right. You can make adjustments by selecting the input by pressing these keys. The “Auto Gain” button is located beneath it. The volume control is to the right. This allows you to adjust the input, output, and headphone volumes with a single control! Here we have the headphone selector once more. These let you change the volume and choose an output.
Moving on, that concludes the top panel. The front panel is comparatively clear of clutter. The EVO 8 features two headphone outputs on the right side and one instrument input on the far left.
All four channels of the machine have 48v phantom power. A USB-C to USB-C cable is required if you wish to use phantom power for all four inputs; otherwise, you will only be able to power two. Speaking of inputs, let’s review this audio interface’s inputs and outputs. Four XLR/1/4-inch inputs on the back use EVO preamps to provide a range of 58 dB. In addition, we have four outputs: Two outputs on the left and two right outputs.
The Audient EVO 8 retails for £145 (price can vary depending on the shop, country, and shipping). This also includes a USB-C cable, instructions, and of course, the Interface itself!
What are our thoughts on the EVO 8 UI, then? Let’s get started, then! First of all, it is incredibly small, lightweight, and portable. Don’t let this deter you, though, since it has a powerful punch! I’m willing to wager that the majority of folks would have space on their desk or in their setup for this! You may even keep it out of sight entirely and avoid touching it because the software allows you to control all the inputs and controls! incredibly helpful for people with limited space!
I simply played through some demo tracks I was working on at the time after connecting it in, and I could immediately feel the difference through my headphones. There was a lot of more clarity! They sounded so clear and were really able to drive my headphone! It made writing, recording, and mixing so much easier and also more comfortable!
Pros
- Great latency performance.
- Minimalist design.
Cons
- Minimalist design
- No at‑a‑glance overview on the hardware.
How to choose
These days, the variety of interfaces available for home recording is just astounding. The field was far more constrained when I first started recording, and if you had a limited budget, your options were even more constrained. Today, for a few hundred dollars or pounds, you can purchase the kind of high-quality preamps that I could only imagine as a 14-year-old, thanks to the constant advancement of technology.
I worked for Dawsons Music and Northwest Guitars for five years in the music retail industry, so I’ve spent a lot of time assisting musicians in selecting the ideal kit. I can offer suggestions, but in the end, it’s up to you to choose what works best for you.
How we test audio interfaces
When choosing which audio interfaces to cover in this book, I decided to begin by grouping them based on the most common use case for each. It made obvious to me to provide a wide range of alternatives that would cover solutions ideal for different usage because audio interfaces encompass a wide spectrum of creatives, from recording musicians to those wishing to create podcasts.
For this guide, we test audio interfaces based on two primary elements. The first is the reviewing method, which is applicable to all of the equipment that MusicRadar tests. The second is testing for latency, which is unique to audio interfaces.